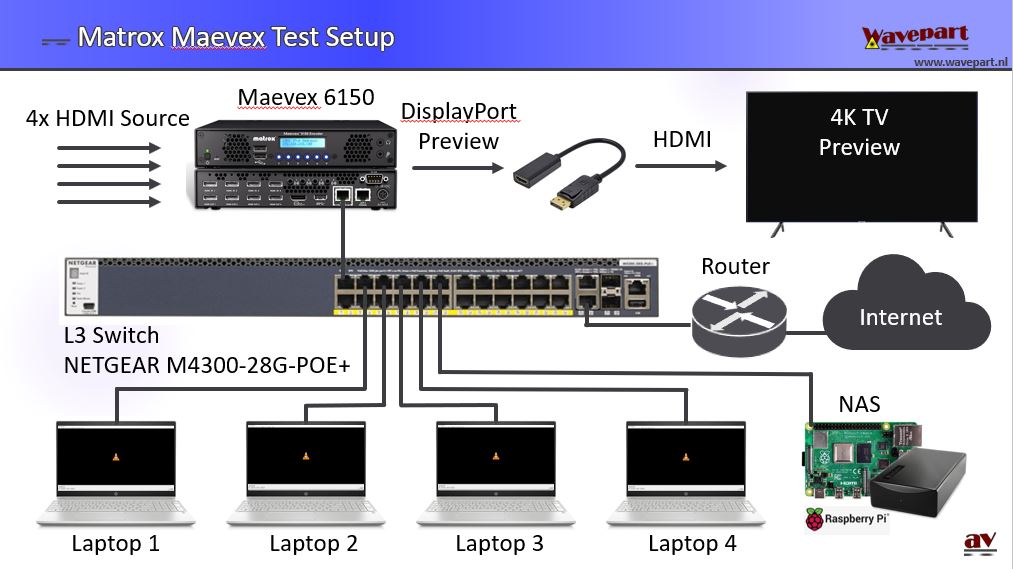
The first test setup I created was with a NETGEAR M4300-28G-POE+ switch connecting the Maevex, 4 laptops, a Rasperry Pi based NAS and an Ipad. I created a separate subnet (LAN) for the Maevex setup and enabled the DHCP server on the NETGEAR switch.

The first thing to do is install the PowerStream Plus software. I had a small issue with setting up the user management, but it was solved quickly. The PowerStream Plus software does not scale. If your screen resolution is too low (e.g. from a budget laptop), the vital “Apply” button will not be visible. It’s best to have at least a full HD screen.
At first, the interface is intimidating. But I think Matrox has done a pretty good job putting so many settings in a user interface without loosing sight of the overall picture. Everything is divided into blocks:
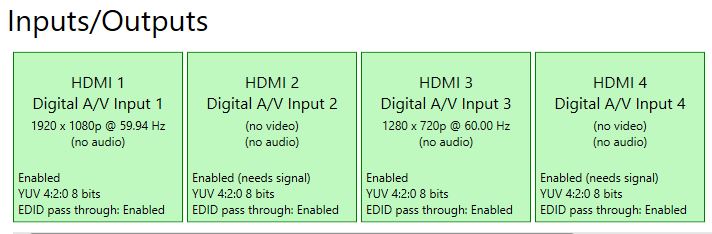
Input / Output block: Physical input and output settings (HDMI / Audio)
- Processing block: layout setting (e.g. HDMI input sources side by side or quad view)
- Encoding block: all the H.264 encoding settings
- Streams block: streaming protocol settings (e.g. RSTP MPEG2-TS)
- Recordings block: define location where you want to store the recorded files
- Encoding block: all the H.264 encoding settings
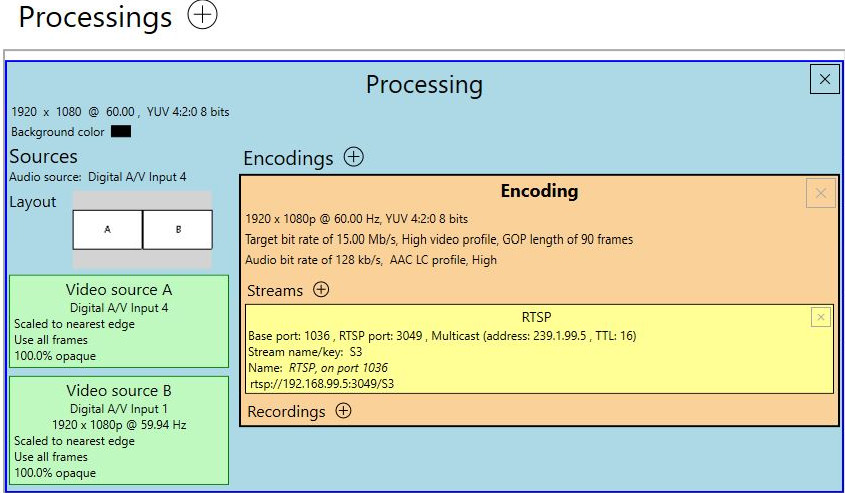
Please notice that the RTSP block in the screenshot above (yellow), displays the exact link you need to enter in VLC to watch the stream (rtsp://……). Very convenient. Also Matrox picks multicast addresses and ports for you. Of course you can change them, but it makes life easier.

In each block, there are a lot of parameters to set. Luckily Matrox has a lot of presets.
On the left side you see the Encoding presets, on the right side are the Streams presets.
Next page:
4. Streaming Protocols
Content:
1. Introduction
2. Maevex Facts
3. Connecting
4. Streaming Protocols
5. Start Encoding
6. BrightSign Decoders
7. 4K
8. Quality
9. Verdict