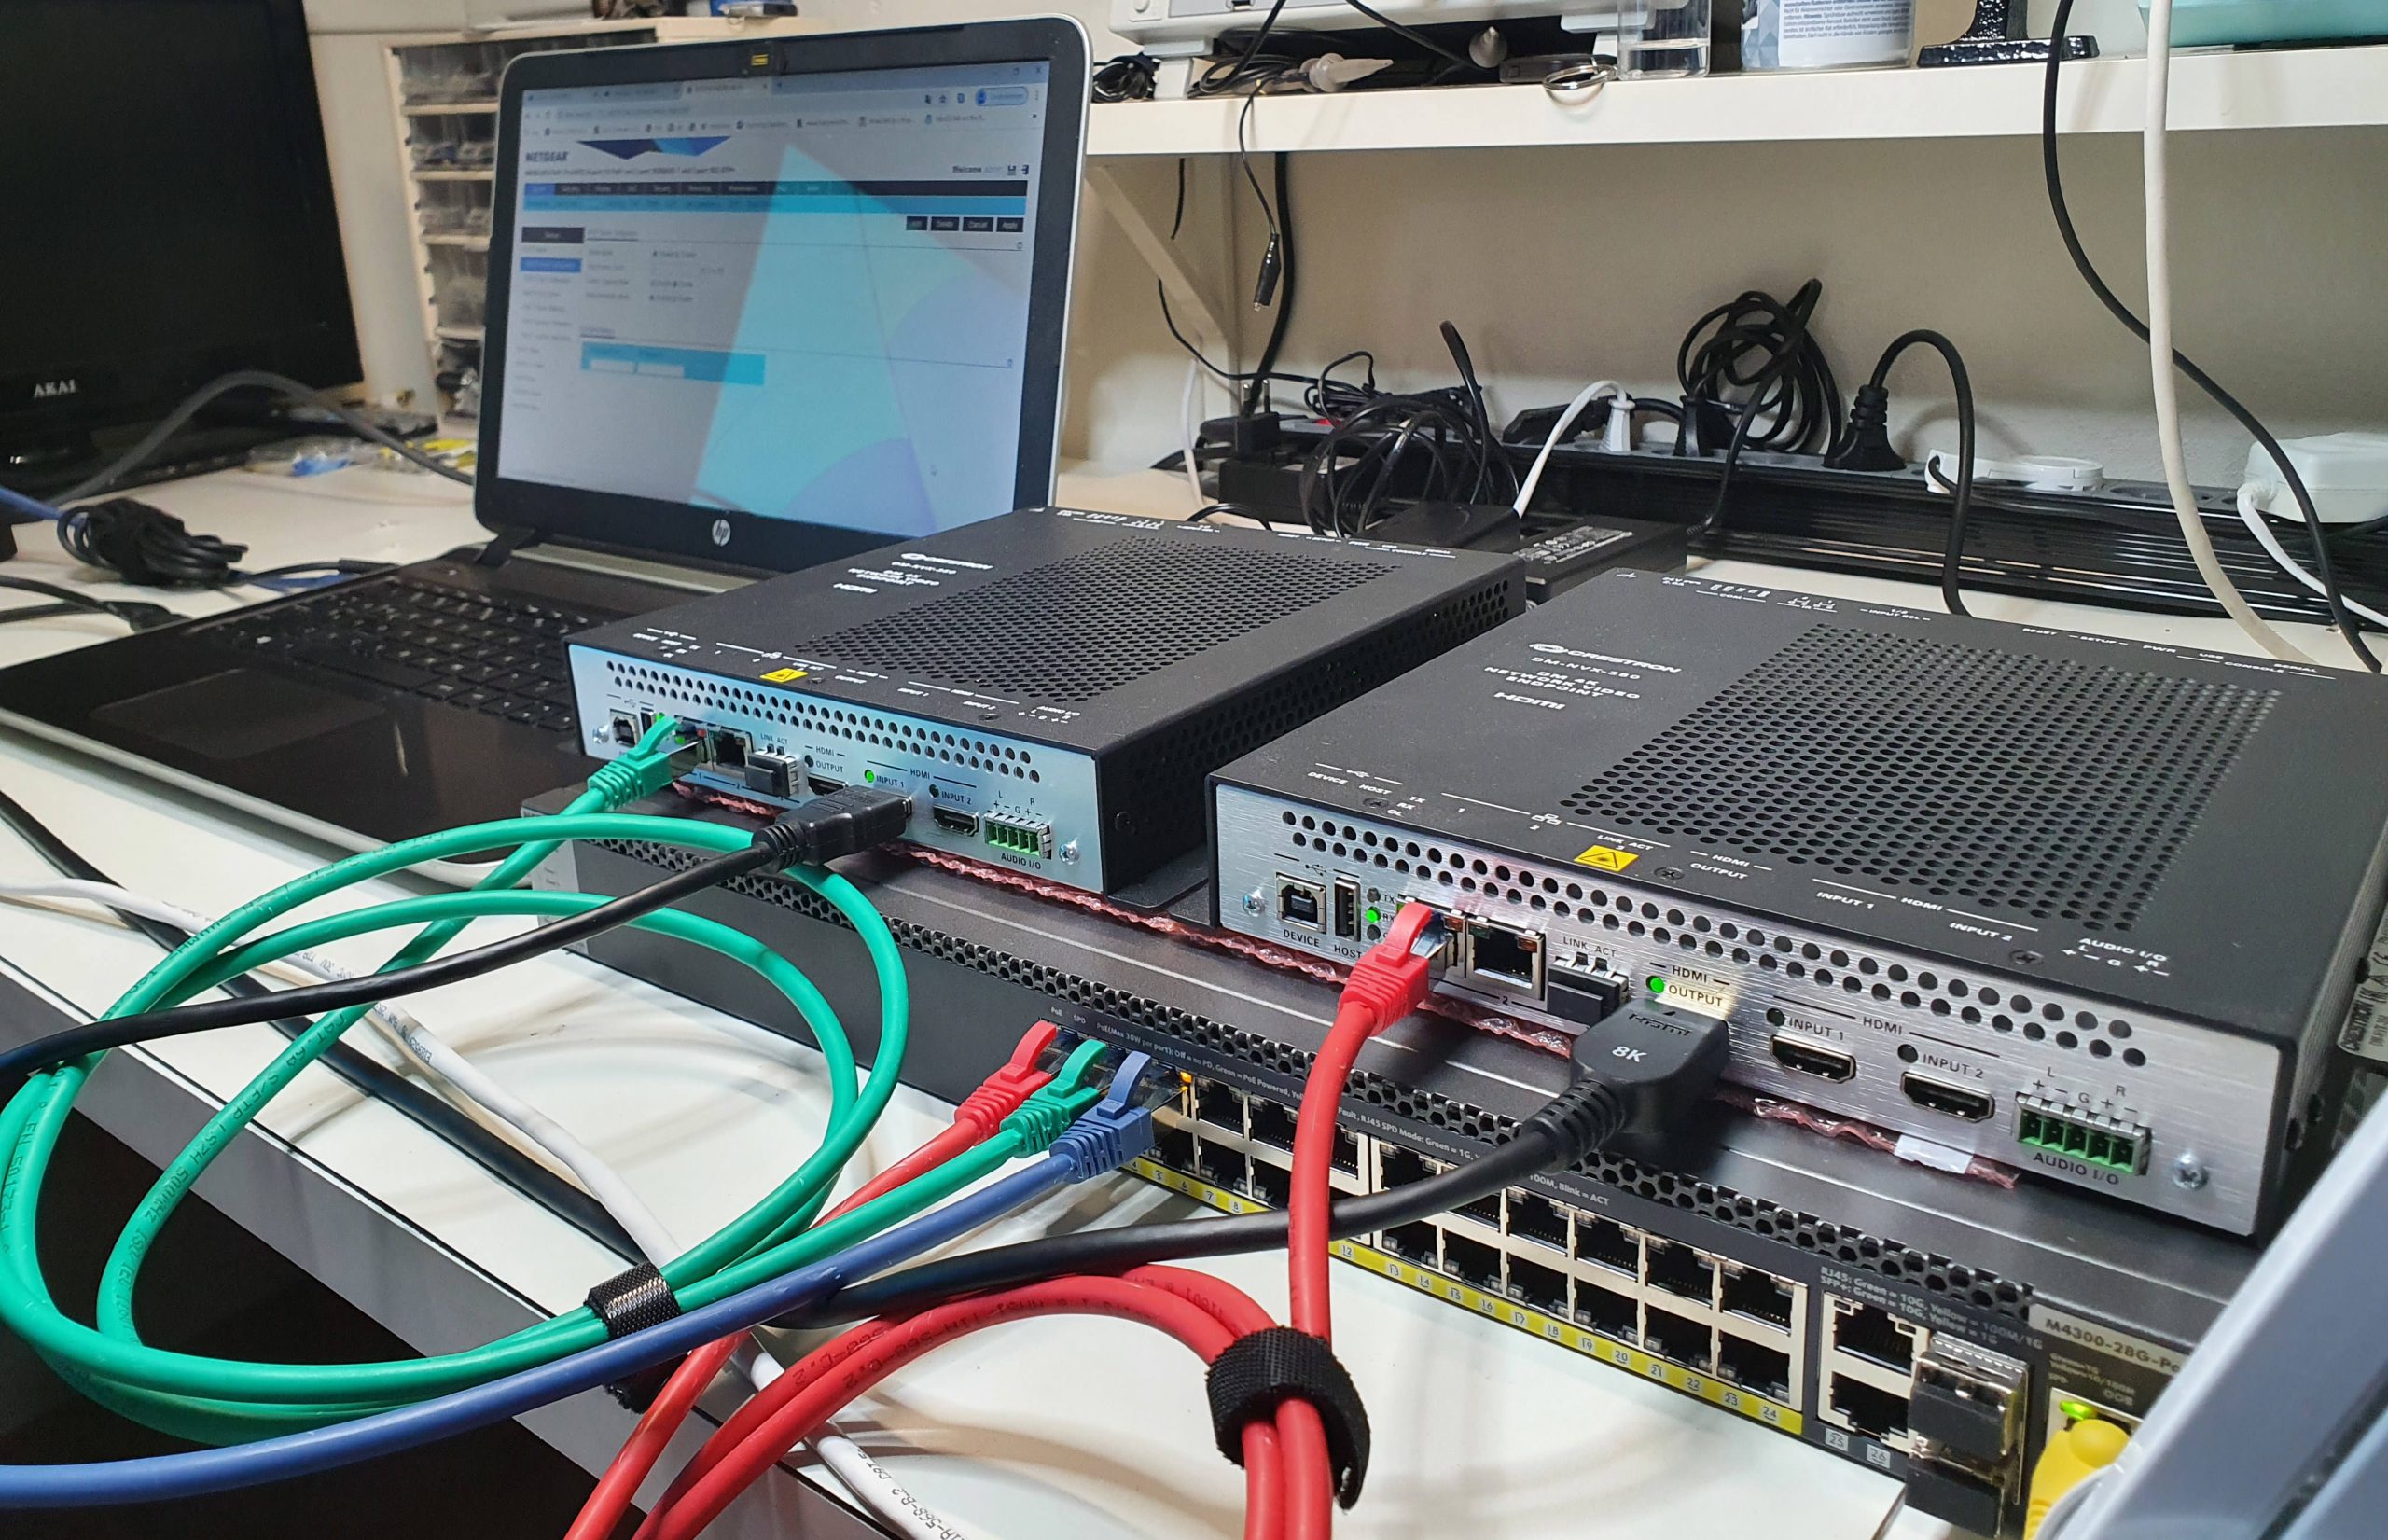
The setup I used for this review consists of:
- 2x Crestron DM-NVX-350 incl. power supplies
- NETGEAR M4300-28G-POE+ switch
- HP Laptop
- For configuring
- As HDMI Source
- Samsung 4K TV (not shown)
On Crestron’s website it says that the DM-NVX-350 can run on UPoE (Cisco Proprietary 60W PoE version). This means it also runs on IEEE 802.3bt Type 3, also called POE++ Type 3. This is basically the IEEE version of Cisco’s UPoE (also 60W). If you want to learn more, check out this NETGEAR website explaining PoE.
The requirement for 60W PoE for the 350 is quite heavy. Ethernet switches with PoE++ are not so common. However, since Power over Ethernet is used for more and more applications (including lighting) I expect to see more affordable PoE++ switches in the near future. My NETGEAR switch supports PoE+ and NOT PoE++, that’s why I used separate power supplies for the DM-NVX-350. For the record: the DM-NVX-E30 and DM-NVX-D30 do run on PoE+ (30W version).
The nice thing of the NETGEAR M4300 switches is that they are pre-configured for AV over IP on VLAN1: IGMP Snooping, querier, filter unregistered multicast, jumbo frames. The only thing is did with the switch is give it an IP address and activate the DHCP server.
The NVX units have DHCP on by default, so they got an IP address from the switch as expected and their web interfaces were accessible. Going through the web interface I noticed the “Auto Update”. You don’t have to google to find the correct firmware and upload it manually, just do a scheduled auto update. Very nice from a user and security point of view.

After updating the units, I wanted to configure the left one as TX and the right one as RX. I expected to find some kind of “identify” button in the web interface to activate a LED on the corresponding unit. However, I couldn’t find it. So I used the MAC address sticker as identifier.
On the TX you need to set a multicast address. Here you are on your own with an empty input box without any suggestions. Before you can assign an address here you need to know:
- The complete range of multicast addresses
224.0. 0.0 to 239.255. 255.255 - Reserved Multicast Addresses
Do NOT use these - Different Multicast IP addresses that result in the same MAC Address
Do not use these either - For NVX you can only use even numbers in the last octet
Uneven numbers are used for secondary audio
It’s a lot of information, you need to know quite a lot about multicast to make the right choice without help. It should’t be that hard to make some safe suggestions in the web interface.
The next step is to subscribe to streams on the RX. They should be auto discovered, but this didn’t work. I am not sure why, but the DHCP server needs to have a Default Gateway set in order to make this work. If you don’t set is, it won’t work.
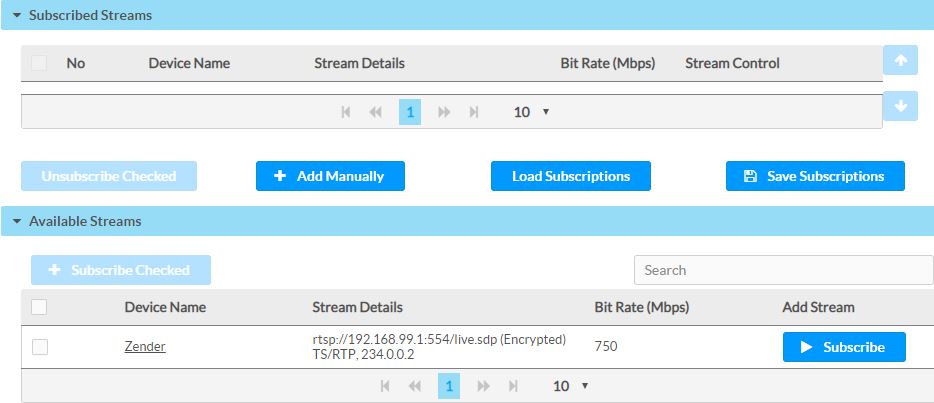
Once the RX is subscribed to a stream you can to “Route” and route the stream to the RX to have an image on the HDMI output.
Next page:
5. Webinterface settings
Content:
1. Introduction
2. Landscape and bandwidth
3. NVX Facts
4. Connecting
5. Webinterface settings
6. Latency
7. Wireshark Network Analysis
8. Verdict